Bikepacking is an exhilarating outdoor activity that combines the best of cycling and camping. It involves riding a mountain bike or gravel bike with luggage attachments to explore remote and rugged terrain. But to fully enjoy this adventure, you need to equip your bike with the right accessories. In this guide, we will explore the essential bikepacking gear that will help you to prepare your bike for the adventure of a lifetime. From luggage systems to lights, we will cover everything you need to know to hit the trails with confidence. So, gear up, and let’s ride!
Bikepacking: An Overview
What is bikepacking?
Bikepacking is a type of cycling that combines the thrill of off-road cycling with the freedom and versatility of camping. It involves carrying all the necessary gear and equipment on your bike to set up campsites in remote locations. Unlike traditional cycling, bikepacking involves riding on rough terrain, such as gravel roads, single-track trails, and mountain bike trails.
Bikepacking offers a unique and challenging way to explore the outdoors, as it allows you to cover long distances on your bike while also experiencing the beauty of nature. It is a great way to escape the crowds and connect with the wilderness, and it is suitable for all levels of cyclists, from beginner to advanced.
One of the key advantages of bikepacking is that it allows you to travel light and efficiently, as you can carry all the necessary gear and equipment on your bike. This means that you can access remote locations that are difficult to reach by other means of transportation, such as hiking or backpacking. Additionally, bikepacking is a sustainable and environmentally friendly way to explore the outdoors, as it does not rely on motorized vehicles or other forms of transportation.
Why is bikepacking popular?
Bikepacking has gained immense popularity in recent years, with more and more people choosing to explore the great outdoors on two wheels. There are several reasons why bikepacking has become so popular, and we’ll delve into them below.
Adventure and Exploration
One of the main reasons bikepacking has become so popular is that it allows people to explore remote areas and wilderness that may be inaccessible by other means. With a bike, you can travel to places that are off the beaten path and experience the thrill of adventure and the beauty of nature.
Environmental Benefits
Bikepacking is an environmentally friendly way to travel, as it produces no emissions and is a low-impact activity. This makes it an attractive option for those who want to reduce their carbon footprint and minimize their impact on the environment.
Health and Fitness
Bikepacking is also a great way to stay healthy and fit. Cycling is a low-impact exercise that can improve cardiovascular health, strengthen muscles, and improve mental well-being. It’s also a social activity that can be enjoyed with others, making it a fun way to stay active and healthy.
Freedom and Independence
Finally, bikepacking offers a sense of freedom and independence that is hard to find in other forms of transportation. With a bike, you can travel at your own pace, stop wherever you want, and explore the world on your own terms. This sense of freedom and independence is a major draw for many bikepackers.
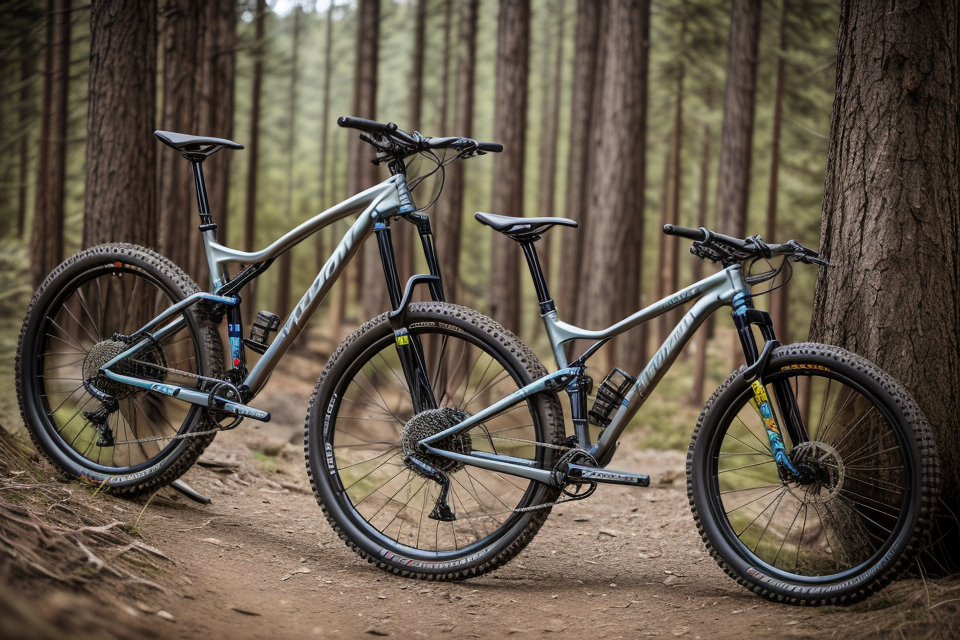
Choosing the Right Bike for Bikepacking
Factors to consider when selecting a bike for bikepacking
When it comes to selecting the right bike for bikepacking, there are several factors to consider. Here are some of the most important ones:
- Frame Material: The frame material is an essential factor to consider when selecting a bike for bikepacking. Aluminum frames are lightweight and durable, making them a popular choice for bikepacking. Carbon fiber frames are even lighter but can be more expensive. Steel frames are another option, but they may be heavier than aluminum or carbon fiber frames.
- Suspension: Suspension is crucial when it comes to bikepacking, as it helps to absorb the shock and vibrations that come with riding on rough terrain. A bike with front suspension will offer a smoother ride, while a bike with both front and rear suspension will provide better control and stability.
- Tire Clearance: Tire clearance is also an essential factor to consider when selecting a bike for bikepacking. The bike should have enough clearance to accommodate the tires you plan to use, which can range from 2.1 to 3 inches depending on the terrain.
- Gearing: Gearing is also an essential factor to consider when selecting a bike for bikepacking. A bike with a wide range of gears will make it easier to climb steep hills and navigate challenging terrain.
- Fit: The bike should fit you well, as this will help you to maintain proper form and prevent discomfort during long rides. Ensure that the bike has a comfortable saddle and that the handlebars are at the right height.
- Weight: Weight is also an essential factor to consider when selecting a bike for bikepacking. A lighter bike will be easier to carry over rough terrain, making it ideal for bikepacking.
- Durability: Durability is also an essential factor to consider when selecting a bike for bikepacking. The bike should be able to withstand the rigors of off-road riding, including rough terrain and weather conditions.
By considering these factors, you can select the right bike for your bikepacking adventures and enjoy a comfortable and enjoyable ride.
Recommended bike types for bikepacking
When it comes to choosing the right bike for bikepacking, there are several factors to consider. The most important consideration is the type of bike that will best suit your needs and the type of terrain you will be riding on. Here are some recommended bike types for bikepacking:
1. Mountain Bikes
Mountain bikes are a popular choice for bikepacking due to their versatility and durability. They have wide tires, strong frames, and suspension systems that make them ideal for rough terrain and technical trails. They also have a lower bottom bracket, which makes it easier to pedal through obstacles and over rocks.
2. Gravel Bikes
Gravel bikes are designed for off-road adventures on a variety of surfaces, including gravel, dirt, and pavement. They have a more upright riding position than mountain bikes, which makes them more comfortable for long distances. They also have wider tires and lower gearing, which makes it easier to ride up hills and over rough terrain.
3. Cyclocross Bikes
Cyclocross bikes are similar to mountain bikes, but they have a more road-oriented geometry and are designed for racing on a variety of surfaces, including pavement, dirt, and mud. They have a lower bottom bracket and a more aggressive riding position than gravel bikes, which makes them more responsive and maneuverable.
4. Touring Bikes
Touring bikes are designed for long-distance cycling on paved roads and gravel paths. They have a more upright riding position than other bike types, which makes them more comfortable for long distances. They also have a larger frame and more storage space, which makes it easier to carry gear and supplies.
When choosing a bike for bikepacking, it’s important to consider your own riding style and the type of terrain you will be riding on. Each bike type has its own unique strengths and weaknesses, so it’s important to choose a bike that will best suit your needs.
Essential Bikepacking Accessories
Frames and forks
Choosing the right frame and fork for bikepacking is crucial to ensure a comfortable and efficient ride. When selecting a frame and fork, consider the following factors:
- Frame Material: Aluminum, steel, and carbon fiber are the most common materials used for bike frames. Each material has its advantages and disadvantages, such as weight, durability, and price. Aluminum frames are lightweight and durable, while carbon fiber frames are lighter and stiffer but more expensive. Steel frames are strong and comfortable but may be heavier than other materials.
- Frame Geometry: The geometry of the frame affects the handling and ride quality of the bike. Look for a frame with a comfortable and upright riding position, as well as a suitable head tube angle and seat tube angle for the type of terrain you‘ll be riding on.
- Fork: The fork should be stiff and provide enough suspension to absorb rough terrain. Look for a fork with a wide range of travel and a tapered steerer tube for improved handling.
- Braze-ons: Look for a frame with plenty of braze-ons for attaching bags, lights, and other accessories.
- Clearance: Make sure the frame has enough clearance for the tires and suspension components you plan to use.
- Weight: Consider the weight of the frame and fork, as this can affect the overall weight of the bike and your ability to carry gear.
Once you’ve selected a frame and fork, you’ll need to make sure they’re set up properly for bikepacking. This may involve installing rack mounts, fork eyelets, and other accessories to make room for your gear. Consult the manufacturer’s instructions and seek professional advice if necessary to ensure your bike is set up safely and securely for bikepacking.
Wheels and tires
When it comes to bikepacking, your wheels and tires are some of the most crucial components to consider. They are the only point of contact between your bike and the ground, and they can make or break your ride. In this section, we will discuss the essential aspects of equipping your bike with the right wheels and tires for bikepacking.
Choosing the Right Wheel Size
The first thing to consider when selecting wheels and tires for bikepacking is the wheel size. The most common sizes for mountain bikes are 27 inches (650b) and 29 inches (29er). Each size has its own advantages and disadvantages, and the best choice will depend on your riding style and terrain.
27 inches (650b) wheels offer a more stable and comfortable ride, making them a popular choice for riders who prefer a more relaxed, off-road experience. They also tend to be more forgiving on rough terrain, which can be helpful for those who are new to bikepacking.
29 inches (29er) wheels, on the other hand, offer a faster and more agile ride. They are popular among riders who prefer a more aggressive, high-speed experience, and they are better suited for technical terrain.
Tire Choices
Once you have selected the right wheel size, the next step is to choose the right tires. Tires are a crucial component of your bike, and they can make a significant difference in your ride.
When it comes to bikepacking, you will want to choose tires that are designed for off-road use. Look for tires that are durable, puncture-resistant, and have a good tread pattern for grip on different types of terrain.
Some popular tire options for bikepacking include:
- Knobbly tires: These tires have a aggressive tread pattern that is ideal for grip on loose or rocky terrain.
- Slick tires: These tires have a smooth tread pattern that is ideal for smooth or paved surfaces.
- Fat tires: These tires have a wider tread pattern that is ideal for soft or muddy terrain.
It’s important to note that the tire choice will depend on the terrain you’ll be riding on. For example, if you’re planning to ride on rocky terrain, you’ll want to choose tires with a more aggressive tread pattern to provide better grip.
Conclusion
In conclusion, choosing the right wheels and tires for your bikepacking adventure is crucial to ensure a safe and enjoyable ride. Whether you choose 27 inches (650b) or 29 inches (29er) wheels, and whether you choose knobbly, slick, or fat tires, make sure to choose tires that are designed for off-road use and that are durable, puncture-resistant, and have a good tread pattern for grip on different types of terrain.
Handlebar and stem
When it comes to bikepacking, the handlebar and stem play a crucial role in providing a comfortable and efficient riding experience. The right combination of handlebar and stem can make a significant difference in how you interact with your bike and the level of control you have over it. In this section, we will discuss the different types of handlebars and stems available, as well as how to choose the right ones for your bikepacking adventures.
Types of Handlebars
Drop bars
Drop bars are the most common type of handlebar used in bikepacking. They are designed to provide a more aggressive riding position and are often preferred by riders who are looking for a more performance-oriented setup. Drop bars are typically made of either aluminum or carbon fiber and come in a variety of shapes and sizes.
Flat bars
Flat bars are another popular option for bikepacking. They are typically wider than drop bars and provide a more upright riding position, which can be more comfortable for longer distances. Flat bars are also often preferred by riders who are carrying a lot of gear, as they provide more room for mounting bags and accessories.
Riser bars
Riser bars are similar to drop bars but have a slight upward curve. They are designed to provide a more comfortable riding position and can be a good option for riders who are looking for a bit more hand position variety.
Choosing the Right Handlebar and Stem
When choosing a handlebar and stem for your bikepacking adventures, there are several factors to consider.
Fit
The first and most important factor to consider is fit. The handlebar and stem should be chosen based on your personal preferences and the type of riding you will be doing. Drop bars are typically preferred by riders who are looking for a more aggressive riding position, while flat bars are more commonly used by riders who prefer a more upright position.
Material
The material of the handlebar and stem is also an important consideration. Aluminum is a common material choice as it is lightweight and durable. Carbon fiber is another option, but it can be more expensive and may not be as durable as aluminum.
Width
The width of the handlebar is also an important consideration. Wider handlebars provide more room for mounting accessories and can be more comfortable for riders with larger hands. However, they may also be more difficult to control in technical terrain.
Length
The length of the stem is also an important consideration. A longer stem can provide more adjustability and allow for a more comfortable riding position. However, it can also make the bike more difficult to maneuver in tight spaces.
In conclusion, the handlebar and stem are essential components of any bikepacking setup. By considering fit, material, width, and length, riders can choose the right combination of handlebar and stem to provide a comfortable and efficient riding experience.
Seat and saddle
Choosing the right seat and saddle is crucial for a comfortable and enjoyable bikepacking experience. The following are some factors to consider when selecting a seat and saddle for your bikepacking adventure:
Fit and Comfort
A comfortable seat and saddle are essential for long-distance rides. Look for a seat and saddle that provide ample support and cushioning, and that can be adjusted to fit your body shape and riding style. A good rule of thumb is to test out a few different options before making a final decision.
Durability
Bikepacking routes often take you through rough terrain, so it’s important to choose a seat and saddle that can withstand the rigors of off-road riding. Look for models that are made with durable materials and that have a solid construction.
Weight
Weight is an important consideration when choosing a seat and saddle for bikepacking. You’ll be carrying your gear and bike for long distances, so you want to minimize the weight of your equipment as much as possible. Look for lightweight options that don’t compromise on comfort or durability.
Type of Seat and Saddle
There are several types of seats and saddles to choose from, each with its own benefits and drawbacks. Here are a few options to consider:
- Hardtail/Suspension Seatpost: A hardtail seatpost is a rigid post that provides some shock absorption, while a suspension seatpost offers more flex and cushioning. Both options can be comfortable for long rides, but a suspension seatpost may be better for rough terrain.
- Hard Saddle: A hard saddle is made of a solid material, such as steel or titanium, and provides minimal cushioning. These saddles are lightweight and durable, but may not be as comfortable for long rides.
- Soft Saddle: A soft saddle is made of foam or other soft materials and provides more cushioning than a hard saddle. These saddles are typically more comfortable for long rides, but may not be as durable.
In conclusion, choosing the right seat and saddle for your bikepacking adventure is essential for a comfortable and enjoyable ride. Consider factors such as fit and comfort, durability, weight, and type of seat and saddle before making a final decision.
Pedals
Pedals are an essential component of any bike, but they become even more important when you’re bikepacking. Not only do they allow you to propel yourself forward, but they also play a crucial role in your bike’s stability and control. Here are some key factors to consider when choosing pedals for your bikepacking adventures:
Platform or Clipless?
The first decision you need to make is whether to go with platform pedals or clipless pedals. Platform pedals offer a simple, easy-to-use design that’s ideal for beginners or anyone who wants a more casual riding experience. They’re also a good choice if you’re planning to do any hiking or walking with your bike, as they allow for easy access to the ground.
Clipless pedals, on the other hand, offer a more secure connection between your feet and your bike. They work by using a spring-loaded mechanism that clips onto the side of your shoe, providing a more stable platform for your feet to push from. While they take some getting used to, clipless pedals can offer greater control and efficiency for more experienced riders.
Material and Design
Once you’ve decided on platform or clipless pedals, you’ll need to consider the material and design. Pedals come in a variety of materials, including aluminum, titanium, and carbon fiber, each with its own advantages and disadvantages. Aluminum pedals are the most common and affordable option, while titanium and carbon fiber pedals are lighter and more durable but also more expensive.
In terms of design, look for pedals that offer a good balance of comfort, support, and efficiency. Platform pedals should have a wide surface area for stability, while clipless pedals should be easy to clip in and out of and offer a comfortable platform for your feet.
Customization
Finally, consider whether you want to customize your pedals. Some pedals come with interchangeable parts, such as different cleat options or replaceable pins, allowing you to tailor them to your specific needs. Other pedals may be compatible with different shoe sizes or cleat systems, giving you even more flexibility.
In conclusion, when it comes to choosing pedals for your bikepacking adventures, there are many factors to consider. From platform or clipless to material and design, there’s a lot to think about. But with the right pedals, you’ll be able to ride with confidence and enjoy the freedom and excitement of bikepacking.
Shifters and brake levers
When it comes to bikepacking, having the right shifters and brake levers is crucial for a comfortable and safe ride. These two components are responsible for changing gears and applying brakes, respectively, and choosing the right ones can make a significant difference in your experience.
Types of Shifters and Brake Levers
There are several types of shifters and brake levers available on the market, each with its own unique features and benefits. Some of the most common types include:
- Bar-end shifters: These shifters are mounted on the ends of the handlebars and are designed for off-road use. They offer a more comfortable grip and allow for easier shifting.
- Twist shifters: These shifters are mounted on the handlebars and are activated by twisting the grip. They are commonly used on road bikes and are easy to use.
- Di2 electronic shifters: These shifters use electronic sensors to shift gears and are commonly used on high-end road bikes. They offer faster and more precise shifting.
- Disc brake levers: These levers are designed for use with disc brakes and offer more stopping power than traditional rim brakes.
Factors to Consider When Choosing Shifters and Brake Levers
When choosing shifters and brake levers, there are several factors to consider. These include:
- Personal preference: Some riders prefer bar-end shifters, while others prefer twist shifters. It’s important to choose the type that feels most comfortable for you.
- Bike type: The type of bike you have will determine which type of shifters and brake levers are compatible. For example, twist shifters are commonly used on road bikes, while bar-end shifters are more common on mountain bikes.
- Terrain: The terrain you’ll be riding on will also play a role in choosing the right shifters and brake levers. For example, if you’ll be riding off-road, bar-end shifters may be more comfortable and easier to use.
- Compatibility: It’s important to choose shifters and brake levers that are compatible with your bike’s existing components.
Installation and Maintenance
Installing shifters and brake levers is a relatively simple process, but it’s important to follow the manufacturer’s instructions to ensure proper installation. Regular maintenance, such as lubricating the components and checking for wear, is also important to ensure they continue to function properly.
In conclusion, choosing the right shifters and brake levers is crucial for a comfortable and safe bikepacking experience. Consider personal preference, bike type, terrain, and compatibility when making your choice, and don’t forget to properly install and maintain them.
Headset and fork
When it comes to bikepacking, having the right equipment is crucial for a comfortable and safe journey. The headset and fork are two essential components that play a significant role in the performance and handling of your bike.
Headset
The headset is the part of the bike that connects the handlebars to the frame. It consists of a bearing system that allows for smooth steering and stability. When choosing a headset for bikepacking, it’s important to consider the following factors:
- Strength: Look for a headset that is designed to withstand the rigors of off-road riding and heavy loads.
- Adjustability: Consider a headset that allows for adjustable cup height and tilt to ensure a comfortable and ergonomic fit.
- Durability: Choose a headset made from high-quality materials that can withstand the elements and rough terrain.
Fork
The fork is the part of the bike that connects the front wheel to the frame. It plays a crucial role in the handling and stability of the bike, especially when navigating rough terrain. When choosing a fork for bikepacking, consider the following factors:
- Travel: Look for a fork with sufficient travel to absorb bumps and provide a comfortable ride.
- Stiffness: Choose a fork that is stiff enough to provide precise handling and control, but not so stiff that it’s uncomfortable to ride.
- Clearance: Make sure the fork has enough clearance to accommodate large tires and loads.
In conclusion, the headset and fork are two essential components that play a crucial role in the performance and handling of your bike when bikepacking. When choosing these components, consider factors such as strength, adjustability, durability, travel, stiffness, and clearance to ensure a comfortable and safe journey.
Bottom bracket
The bottom bracket is a crucial component of your bike that is responsible for supporting the cranks and pedals. It is the point where the power is transferred from your legs to the wheels, and it is essential to ensure that it is in good condition before embarking on a bikepacking trip.
Types of Bottom Brackets
There are two main types of bottom brackets:
- External Bottom Bracket: This type of bottom bracket is found on most road bikes and mountain bikes. It is attached to the frame using bearings and requires regular maintenance to ensure smooth rotation.
- Internal Bottom Bracket: This type of bottom bracket is found on some road bikes and all mountain bikes. It is integrated into the frame and is not serviceable, but it offers a more aerodynamic design and better frame protection.
How to Check the Bottom Bracket
Before embarking on a bikepacking trip, it is important to check the condition of your bottom bracket. Here are the steps to follow:
- Use a bottom bracket tool to remove the cranks and pedals.
- Spin the cranks with your hand to check for any play or wobbling.
- Use a gauge to measure the endplay (the amount of play in the bearings). The endplay should be within the manufacturer’s specifications.
- Check for any signs of wear or damage, such as rust or bent spindles.
How to Maintain the Bottom Bracket
To ensure that your bottom bracket stays in good condition, follow these maintenance tips:
- Regularly clean the bottom bracket and surrounding area to remove dirt and debris.
- Apply a light lubricant to the bearings to reduce friction.
- Inspect the bottom bracket after every ride and make any necessary adjustments or repairs.
In conclusion, the bottom bracket is a critical component of your bike that requires regular maintenance to ensure smooth operation. By following the steps outlined above, you can ensure that your bottom bracket is in good condition and ready for your next bikepacking adventure.
Crankset
A crankset is a crucial component of your bike that powers the wheels and propels you forward. It is made up of two parts: the crank arms and the chainrings. The crank arms are the cylindrical parts that attach to the bike’s frame and are where you pedal. The chainrings are the circular parts that the chain wraps around and are attached to the crank arms.
When choosing a crankset for bikepacking, there are several factors to consider. First, you need to decide on the number of chainrings you want. A double crankset has two chainrings, while a single crankset has only one. Double cranksets are generally more versatile, as they allow you to switch between a lower and higher gear range. However, single cranksets are lighter and simpler, which may be an advantage for some riders.
Next, you need to consider the material of the crankset. Aluminum cranksets are lighter and less expensive, but may not be as durable as heavier options. Carbon fiber cranksets are very light, but can be more expensive. Steel cranksets are durable and long-lasting, but may be heavier than other options.
Finally, you need to think about the length of the crank arms. Shorter crank arms may be easier to pedal on technical terrain, while longer crank arms may provide a more comfortable pedaling position. Experiment with different lengths to find what works best for you.
In summary, when choosing a crankset for bikepacking, consider the number of chainrings, material, and crank arm length. Choose a crankset that fits your riding style and the terrain you’ll be riding on.
Chain
The chain is one of the most crucial components of your bike that needs to be properly maintained and equipped for bikepacking. A well-maintained chain will ensure smooth and efficient pedaling, prevent wear and tear on other components, and extend the lifespan of your bike. Here are some essential tips for equipping your bike with the right chain for bikepacking:
- Choose the right chain size: The chain size is typically determined by the size of your bike’s frame and the number of gears. A chain that is too small or too large can cause problems with shifting and fit. It is important to choose a chain that is the right size for your bike and the number of gears it has.
- Check the chain wear: Before setting out on a bikepacking trip, it is important to check the wear on your chain. A worn chain can cause problems with shifting and damage other components. A good rule of thumb is to replace the chain every 3,000 miles or so, but this can vary depending on the conditions you ride in and how well you maintain your bike.
- Use a chain lubricant: A chain lubricant can help reduce wear on the chain and keep it running smoothly. There are many different types of chain lubricants available, ranging from wet lubes to dry lubes and everything in between. Choose a lubricant that is compatible with your bike and the conditions you will be riding in.
- Clean the chain regularly: A dirty chain can cause problems with shifting and damage other components. It is important to clean the chain regularly, especially after riding in muddy or dusty conditions. Use a chain cleaner and brush to remove dirt and debris from the chain, and then apply a lubricant to keep it running smoothly.
- Check the chain tension: The chain tension should be adjusted to ensure proper shifting and prevent damage to other components. A chain that is too loose or too tight can cause problems with shifting and wear on the chain and other components. Check the chain tension regularly and adjust it as needed.
By following these tips, you can ensure that your bike is equipped with the right chain for bikepacking, which will help you enjoy a safe and enjoyable ride.
Cassette
A cassette is a collection of gears that are attached to the rear wheel of a bike. It is an essential component for bikepacking because it allows the rider to change gears according to the terrain and level of difficulty. The cassette is made up of different sized cogs that work together to provide a range of gears. The size of the cogs determines the number of teeth on each cog, and the number of teeth on each cog determines the gear ratio.
There are two main types of cassettes: 9-speed and 10-speed. 9-speed cassettes have a range of 11-25 teeth, while 10-speed cassettes have a range of 11-32 teeth. The 10-speed cassettes are more popular among bikepackers because they provide a wider range of gears, which is useful for climbing steep hills and descending downhills.
When choosing a cassette for bikepacking, it is important to consider the terrain you will be riding on. If you plan to ride on steep hills and rough terrain, you may want to choose a cassette with a wider range of gears. On the other hand, if you plan to ride on smoother terrain, a cassette with a narrower range of gears may be sufficient.
It is also important to consider the weight of the cassette when choosing one for bikepacking. Cassettes come in different weights, and the lighter ones are easier to pedal, especially when carrying a heavy load.
When installing a cassette, it is important to ensure that it is properly aligned with the chainring and the frame. Misalignment can cause the chain to jump off the cogs, which can be dangerous and inconvenient. It is also important to ensure that the cassette is properly lubricated to prevent wear and tear.
In summary, a cassette is an essential component for bikepacking because it allows the rider to change gears according to the terrain and level of difficulty. When choosing a cassette, it is important to consider the terrain you will be riding on, the weight of the cassette, and the proper installation and lubrication.
Derailleurs
Derailleurs are a crucial component for any bikepacking adventure. They are responsible for shifting gears, allowing the rider to easily switch between different cassettes. There are two main types of derailleurs: front and rear. Front derailleurs are typically used on mountain bikes and are responsible for shifting the chain between the front chainrings. Rear derailleurs, on the other hand, are used on both mountain and road bikes and are responsible for shifting the chain between the cassette.
When choosing a derailleur, it’s important to consider the type of terrain you’ll be riding on. For example, if you’ll be riding primarily on steep hills, you may want to consider a derailleur with a longer cage to provide more clearance for the chain. Additionally, you’ll want to ensure that your derailleur is compatible with your bike’s frame and drivetrain.
When installing your derailleur, it’s important to properly adjust the derailleur limit screws to prevent chain drops and ensure smooth shifting. It’s also important to check the derailleur’s cable tension and make any necessary adjustments to ensure proper shifting.
In summary, derailleurs are a critical component for any bikepacking adventure. They allow the rider to easily switch between different gears, making it easier to tackle a variety of terrain. When choosing a derailleur, it’s important to consider the type of terrain you’ll be riding on and ensure that it’s compatible with your bike’s frame and drivetrain. Proper installation and adjustment is also key to ensure smooth shifting.
Brake calipers
When it comes to outfitting your bike for bikepacking, brake calipers are an essential accessory that should not be overlooked. Brake calipers are the mechanical devices that are responsible for slowing down and stopping your bike, and they play a crucial role in ensuring your safety while you’re on the trail. Here are some key things to consider when selecting brake calipers for your bikepacking adventures:
Disc brakes vs. rim brakes
One of the first decisions you’ll need to make when selecting brake calipers is whether to go with disc brakes or rim brakes. Disc brakes are increasingly popular among bikepackers because they offer more stopping power and are less prone to wear and tear than rim brakes. Disc brakes work by squeezing two brake pads against a rotor attached to the wheel, which creates friction that slows down the bike. Rim brakes, on the other hand, work by pressing a pad against the rim of the wheel, which also creates friction that slows down the bike. Rim brakes are typically less expensive than disc brakes, but they may not provide the same level of stopping power and can be more prone to wear and tear.
Rotor size
Another important consideration when selecting brake calipers is the size of the rotor. The rotor is the metal disc that the brake pads grip onto to slow down the bike, and it’s important to choose a rotor that’s appropriate for your bike and the terrain you’ll be riding on. In general, larger rotors provide more stopping power and are less prone to overheating, but they may also be heavier and more expensive than smaller rotors.
Brake pad material
The brake pads themselves are also an important consideration when selecting brake calipers. There are a variety of materials to choose from, including rubber, resin, and metal, each with its own pros and cons. Rubber brake pads are generally the least expensive option, but they may not provide as much stopping power as other materials. Resin brake pads are a popular choice among bikepackers because they offer a good balance of stopping power and affordability. Metal brake pads, on the other hand, are the most expensive option but can provide the most stopping power and durability.
Mounting
Finally, it’s important to consider how the brake calipers will be mounted to your bike. There are a variety of mounting options available, including post-mount and IS mount, each with its own advantages and disadvantages. Post-mount brake calipers are typically easier to install and adjust, but they may not provide as much stability as IS mount brake calipers. IS mount brake calipers, on the other hand, may be more difficult to install and adjust, but they can provide greater stability and control.
In conclusion, when it comes to outfitting your bike for bikepacking, brake calipers are an essential accessory that should not be overlooked. By considering factors such as disc brakes vs. rim brakes, rotor size, brake pad material, and mounting options, you can ensure that your bike is equipped with the right brake calipers for your adventures on the trail.
Brake levers
Brake levers are a crucial component of any bike, especially when it comes to bikepacking. They allow you to control the speed and stopping power of your bike, which is essential for navigating different terrains and avoiding accidents. When selecting brake levers for bikepacking, there are several factors to consider.
- Material: The material of the brake levers is an important consideration. Aluminum levers are lightweight and durable, making them a popular choice for bikepacking. However, some riders prefer steel levers for their increased strength and resistance to wear and tear.
- Design: The design of the brake levers can also impact their performance. Levers with a larger surface area can provide more leverage and stopping power, while levers with a smaller surface area may be easier to reach and provide more precision.
- Adjustability: Adjustable brake levers can be helpful for riders with different hand sizes or preferences. Some levers allow for adjustments to the reach and angle of the lever, while others may have interchangeable pads or grips.
- Compatibility: It’s important to ensure that the brake levers you choose are compatible with your bike’s braking system. Some levers may require specific brake calipers or other components, so be sure to check the compatibility before making a purchase.
- Weight: Weight is an important consideration for bikepacking, as every ounce counts. Look for brake levers that are lightweight but still provide sufficient stopping power.
Overall, choosing the right brake levers for your bikepacking adventures is essential for safe and efficient riding. Consider the material, design, adjustability, compatibility, and weight when making your selection to ensure that you have the best possible experience on the trail.
Tires
Tires are a critical component of any bike, but they are especially important when bikepacking. The right tires can make a significant difference in your ride’s comfort, traction, and control. When choosing tires for bikepacking, consider the following factors:
Tire Size
The size of your tires will depend on the type of bike you have and the terrain you plan to ride. For example, if you have a full-suspension mountain bike, you may want to use wider tires to improve stability and control. However, if you have a hardtail mountain bike or a gravel bike, you may prefer narrower tires for better speed and efficiency.
Tire Type
There are two main types of tires for bikepacking: knobby and slick. Knobby tires are better for off-road riding and provide more traction on loose or rocky terrain. Slick tires, on the other hand, are better for pavement or smooth dirt roads and offer better speed and efficiency.
Tire Pressure
The pressure you run in your tires will depend on the terrain you’re riding and your personal preference. Lower pressure can provide better traction and comfort, but it also increases the risk of puncturing your tires. Higher pressure can improve speed and efficiency, but it may not provide enough traction on rough terrain.
Tire Maintenance
Proper tire maintenance is crucial for safe and enjoyable bikepacking. Make sure to check your tire pressure regularly and adjust as needed. You should also inspect your tires for punctures, cuts, or other damage before each ride. It’s a good idea to carry a spare tube and a tire patch kit in case of a flat tire.
Overall, choosing the right tires for your bikepacking adventures is essential for a comfortable and safe ride. Consider the size, type, pressure, and maintenance of your tires to ensure that you’re well-equipped for any terrain.
Bike bags and luggage
Bikepacking requires a significant amount of gear to be carried on your bike, and the first step in outfitting your bike for the journey is selecting the right bike bags and luggage. The type of bags you choose will depend on the specific needs of your trip, but there are a few key factors to consider when making your selection.
Type of Bags
The first decision you’ll need to make is what type of bags to use. There are three main types of bike bags: handlebar bags, saddle bags, and panniers.
- Handlebar bags are the most common type of bike bag and are designed to be mounted to the handlebars of your bike. They are typically small and lightweight, making them ideal for carrying essential items like a camera, phone, and snacks.
- Saddle bags are smaller bags that are mounted to the saddle of your bike. They are often used to carry items that you need to access quickly, such as a spare tube or a first aid kit.
- Panniers are larger bags that are designed to be mounted to the frame of your bike. They are ideal for carrying heavier items like camping gear, clothing, and food.
Size and Capacity
The size and capacity of your bike bags will depend on the length of your trip and the amount of gear you plan to carry. It’s important to consider both the weight and volume of your bags, as well as their overall size and shape.
Larger bags may be more comfortable to carry, but they may also be more difficult to maneuver in tight spaces. Smaller bags may be easier to handle, but they may not be able to hold enough gear for longer trips.
Mounting Systems
When selecting bike bags, it’s important to consider the mounting system that is used to attach the bags to your bike. Most bags use either a strap-based or buckle-based system, but there are also some bags that use a proprietary mounting system that is specific to their brand.
It’s important to choose a mounting system that is compatible with your bike and that allows you to easily attach and remove the bags as needed.
Weight and Durability
Finally, it’s important to consider the weight and durability of your bike bags. Lighter bags may be easier to carry, but they may not be as durable as heavier bags.
Look for bags that are made from high-quality materials that can withstand the rigors of bikepacking. Consider the type of terrain you‘ll be riding on and choose bags that are suitable for the conditions.
In conclusion, choosing the right bike bags and luggage is a crucial step in outfitting your bike for bikepacking. Consider the type of bags, size and capacity, mounting systems, weight and durability when making your selection.
Lighting systems
Lighting systems are an essential component of any bikepacking trip, especially if you plan on riding during early mornings or late evenings. Here are some factors to consider when selecting the right lighting system for your bikepacking adventure:
Brightness
The brightness of your lighting system is crucial to ensure that you can see and be seen while riding. Look for lights with a minimum of 500 lumens for daytime riding and 1,000 lumens for nighttime riding.
Battery life
Battery life is another important factor to consider when selecting a lighting system. Look for lights with long battery life, ideally lasting for several hours, so you don’t have to worry about recharging your lights during your trip.
Mounting options
Choose a lighting system with multiple mounting options to ensure that you can attach the lights to your bike in different ways, depending on your needs. This could include a handlebar mount, seatpost mount, and helmet mount.
Water resistance
If you plan on riding in wet conditions, choose a lighting system that is water-resistant or waterproof. This will ensure that your lights can withstand the elements and keep you visible during your ride.
Additional features
Some lighting systems come with additional features such as USB rechargeable batteries, automatic sensors, and interchangeable lenses. These features can enhance your riding experience and make your lighting system more versatile.
By considering these factors, you can choose a lighting system that is tailored to your specific needs and ensure that you are prepared for any bikepacking adventure.
GPS and navigation devices
GPS (Global Positioning System) and navigation devices are crucial for bikepacking trips, as they help you navigate through unfamiliar terrain and stay on track. When selecting a GPS device, consider the following factors:
- Battery life: A longer battery life is essential for extended bikepacking trips. Look for devices with a battery life of at least 12 hours.
- Size and weight: Choose a device that is compact and lightweight, so it won’t add unnecessary weight to your bike.
- Water resistance: Water resistance is important if you’re planning to ride in wet conditions. Look for devices with an IPX rating to ensure they are water-resistant.
- GPS accuracy: Consider the GPS accuracy of the device, as this can affect its performance in dense forests or mountainous areas.
- Route planning: Some devices offer advanced route planning features, such as suggesting the best route based on your preferences and skill level.
- Display: Consider the size and quality of the display, as this can impact your ability to read it in bright sunlight.
- Mounting options: Ensure that the device comes with mounting options that allow you to attach it to your bike without obstructing your view.
- Compatibility: Make sure the device is compatible with other devices you may use, such as smartphones or cycling computers.
Some popular GPS and navigation devices for bikepacking include Garmin Edge series, Wahoo Elemnt series, and Lezyne GPS. It’s important to research and compare different devices to find the one that best suits your needs and budget.
Hydration systems
When embarking on a bikepacking adventure, staying hydrated is crucial for both you and your bike. A well-designed hydration system can make all the difference in maintaining peak performance during your ride. In this section, we’ll discuss the various components of a comprehensive hydration system and how to choose the right gear for your needs.
Types of Hydration Systems
There are two primary types of hydration systems:
- Water bottle cages: These are simple yet effective solutions for carrying water on your bike. They are designed to securely hold water bottles, which can be easily accessed when you need a refill.
- Hydration packs: These backpack-style systems feature a bladder that can be filled with water or other hydration drinks. They typically have a tube that connects to a drinking port, allowing you to sip water without having to stop and remove the pack.
Factors to Consider When Choosing a Hydration System
When selecting a hydration system, consider the following factors:
- Capacity: Determine how much water you’ll need for your ride, and choose a system that can accommodate that amount. If you’re planning a multi-day adventure, you may want to carry additional water or use a hydration pack with a larger capacity.
- Weight: Carrying extra weight on your bike can be cumbersome, so it’s essential to choose a system that’s lightweight yet durable.
- Ease of use: Consider how easy it is to access and refill your hydration system while riding. Some systems may require you to stop completely, while others can be refilled on the go.
- Compatibility: Ensure that your hydration system is compatible with your bike’s existing mounts or can be easily adapted to fit your bike.
- Comfort: Look for systems that are comfortable to wear, with padded straps and a well-fitting design.
Hydration System Accessories
To enhance your hydration system’s performance, consider adding the following accessories:
- Hydration tubes: These lightweight tubes connect your hydration pack or water bottle to your mouth, allowing you to drink without removing the pack.
- Hydration reservoirs: For a more convenient solution, opt for a hydration pack with a built-in reservoir. These packs feature a bladder that can be filled with water or hydration drinks, making it easy to stay hydrated throughout your ride.
- Water filters: If you’re planning to ride in areas with limited access to clean water, a water filter can be a vital accessory. These filters attach to your hydration system and allow you to collect and filter water from natural sources.
- Hydration mix: To boost your hydration levels, consider adding electrolyte mix to your water. These drinks help maintain the proper balance of fluids and minerals in your body, promoting better overall performance.
By selecting the right hydration system and accessories, you can ensure that you and your bike stay properly hydrated during your bikepacking adventures.
Repair kits and tools
Repair kits and tools are crucial for any bikepacking trip, as they allow you to make quick and effective repairs on the go. A well-equipped repair kit can help you deal with flat tires, broken spokes, and other common issues that may arise during your ride. Here are some essential repair kits and tools to consider:
Multi-tool
A multi-tool is an essential piece of equipment for any bikepacking trip. It should include a range of tools, such as Allen keys, hex keys, screwdrivers, and a chain breaker. Look for a high-quality multi-tool that is durable and easy to use.
Tire repair kit
A tire repair kit is essential for dealing with flat tires. A good kit should include a patch kit, tire plugs, and a tire inflator. Make sure you know how to use the kit before you set off on your ride.
Spare parts
It’s a good idea to carry spare parts for your bike, such as a chain link, derailleur hanger, and bottom bracket. These parts are relatively inexpensive and can save you a lot of time and hassle if they break during your ride.
Pumps and inflators
Make sure you have a reliable pump or inflator with you on your bikepacking trip. A floor pump is a good option, as it is easy to use and can inflate your tires quickly. Alternatively, you can carry a CO2 inflator, which is lighter and more compact.
First aid kit
Finally, it’s important to carry a first aid kit with you on your bikepacking trip. This should include bandages, gauze, tweezers, and any personal medications you may need. Knowing how to treat basic injuries can be vital in remote areas where medical help may be far away.
Customizing Your Bike for Optimal Performance
Adjusting the geometry of your bike
When it comes to customizing your bike for optimal performance, adjusting the geometry of your bike is an essential step. This involves making adjustments to the angles and lengths of the bike’s frame and components to ensure that it fits you perfectly and handles the way you want it to. Here are some key points to consider when adjusting the geometry of your bike:
- Frame size: The first step in adjusting the geometry of your bike is to make sure that the frame size is appropriate for your height and body type. A bike that is too small or too large can affect your handling and make it difficult to control.
- Head angle: The head angle is the angle between the ground and the point where the top tube and seat tube meet the head tube. A steeper head angle can make the bike more stable at high speeds, while a slacker head angle can make the bike more maneuverable. Experiment with different head angles to find the one that works best for you.
- Seat tube angle: The seat tube angle is the angle between the seat tube and the ground. A steeper seat tube angle can put you in a more aggressive position for climbing and descending, while a slacker seat tube angle can make the bike more comfortable for long rides.
- Fork offset: The fork offset is the distance between the center of the steering axis and the center of the wheel. A shorter fork offset can make the bike more agile and responsive, while a longer fork offset can make the bike more stable at high speeds.
- Dropper post: A dropper post is a type of seatpost that can be adjusted to lower your saddle height for descents. This can help you maintain better control and visibility on technical terrain.
By adjusting the geometry of your bike, you can customize it to fit your riding style and preferences. Whether you’re a cross-country racer or a trail rider, taking the time to get your bike set up properly can make a big difference in your performance and enjoyment on the trail.
Installing a dropper post
A dropper post is a type of seat post that can be adjusted in length, allowing the rider to lower their saddle when they need to. This is especially useful when riding off-road or over rough terrain, as it allows the rider to maintain a comfortable seating position while also keeping their center of gravity low. Installing a dropper post on your bike can be a relatively simple process, but it does require some tools and a bit of mechanical knowledge.
Step 1: Measure Your Current Seat Post
Before you start, it’s important to measure the length of your current seat post. This will help you determine the appropriate length for your new dropper post. To do this, remove the seat post clamp and measure the length of the post from the top of the clamp to the bottom of the post. Be sure to take accurate measurements, as a dropper post that is too short or too long can affect the performance of your bike.
Step 2: Choose a Dropper Post
Once you have measured your current seat post, you can start looking for a dropper post that will fit your bike. There are many different types of dropper posts available, so it’s important to choose one that is compatible with your bike and meets your specific needs. Some factors to consider when choosing a dropper post include the length of the post, the weight of the post, and the type of hydraulic lockout system (if any).
Step 3: Remove the Old Seat Post
With your new dropper post in hand, you can start the installation process by removing the old seat post. To do this, loosen the seat post clamp and carefully pull the post out of the frame. Be sure to take note of the orientation of the post, as it may need to be reinstalled in the same position.
Step 4: Install the New Seat Post
With the old seat post removed, you can start installing the new dropper post. Begin by inserting the post into the frame and positioning it in the desired location. Once you have the post in the correct position, tighten the seat post clamp to hold the post in place.
Step 5: Adjust the Length
Once the new dropper post is installed, you can start adjusting the length. To do this, loosen the clamp and turn the post to the desired length. Be sure to check the alignment of the post, as it should be level when fully extended. Once you have the length set, tighten the clamp to hold the post in place.
Step 6: Test the Dropper Post
With the installation complete, it’s time to test the new dropper post. Take your bike for a ride and see how the new post performs. Make any necessary adjustments to the length or hydraulic lockout system, and enjoy the benefits of a dropper post on your bike.
Upgrading the brakes
When it comes to upgrading the brakes on your bike for bikepacking, there are a few key things to consider. First and foremost, you’ll want to make sure that your brakes are up to the task of handling the terrain and conditions you’ll be encountering on your trip. This means choosing brakes that are powerful enough to stop you quickly and effectively, yet sensitive enough to allow for precise control.
One popular option for upgrading the brakes on a bikepacking rig is to go with hydraulic disc brakes. These brakes use a fluid to create pressure and provide stopping power, and they offer a number of advantages over traditional mechanical disc brakes. For one, they tend to be more powerful and consistent, which can be especially useful when you’re carrying a heavy load or riding in difficult conditions. They also tend to be more adjustable, which can help you fine-tune your braking performance to your liking.
Of course, hydraulic disc brakes aren’t the only option available, and they may not be the best choice for every rider or every bike. If you’re not sure which type of brakes are right for you, it’s a good idea to consult with a professional mechanic or bike shop. They can help you assess your needs and make recommendations based on your specific situation.
Once you’ve decided on the type of brakes you want to upgrade to, the next step is to actually make the upgrade. This typically involves removing the old brakes and installing the new ones, which may require some specialized tools and knowledge. If you’re not comfortable with this process, it’s best to leave it to a professional.
Overall, upgrading the brakes on your bike is an important step in preparing it for bikepacking. By choosing powerful, sensitive brakes that are well-suited to your needs, you can help ensure that you’ll be able to stop quickly and effectively no matter what challenges you encounter on the trail.
Changing the crankset
When it comes to customizing your bike for optimal performance in bikepacking, one of the most important upgrades you can make is changing the crankset. The crankset is the component that connects the pedals to the crank arms, and it plays a crucial role in the efficiency and power of your pedaling motion.
Types of Cranksets
There are several types of cranksets available, each with its own unique benefits and drawbacks. Some of the most popular options include:
- Single chainring cranksets: These cranksets feature a single chainring that is typically larger than the chainrings on a standard road bike. They are popular among bikepackers because they are simple, lightweight, and easy to maintain.
- Double chainring cranksets: These cranksets feature two chainrings, with the larger ring typically being used for climbing and the smaller ring being used for descending and low-speed riding. They offer more gear options than single chainring cranksets, making them a good choice for hilly or mountainous terrain.
- Triple chainring cranksets: These cranksets feature three chainrings, with the middle ring typically being used for cruising at moderate speeds. They offer the most gear options of any crankset, making them a good choice for riders who need a wide range of gears for different types of terrain.
Benefits of Upgrading Your Crankset
Upgrading your crankset can offer several benefits, including:
- Increased power and efficiency: A higher quality crankset can help you pedal more efficiently, allowing you to generate more power and speed.
- Improved comfort: Some cranksets are designed with comfort in mind, featuring a more ergonomic shape that reduces stress on your knees and legs.
- Customization: By choosing the right crankset, you can customize your bike to better suit your riding style and the terrain you’ll be riding on.
How to Choose the Right Crankset
When choosing a crankset, there are several factors to consider, including:
- Your riding style: If you plan to do a lot of climbing, a double or triple chainring crankset may be a good choice. If you plan to do mostly flat or rolling terrain, a single chainring crankset may be sufficient.
- The terrain you’ll be riding on: If you’ll be riding on hilly or mountainous terrain, a crankset with a lower gear range may be more suitable. If you’ll be riding on flatter terrain, a higher gear range may be more appropriate.
- Your personal preferences: Ultimately, the right crankset for you will depend on your personal preferences and riding style. Consider factors such as weight, material, and size when making your decision.
Conclusion
Changing the crankset on your bike is an essential upgrade for bikepacking. By choosing the right crankset, you can improve your pedaling efficiency, comfort, and customization options. Consider the type of crankset, the benefits of upgrading, and your personal preferences when making your decision.
Swapping the handlebar
Swapping the handlebar is an essential customization when it comes to bikepacking. It allows you to change the riding position, making it more comfortable and efficient. The choice of handlebar will depend on the type of bikepacking you plan to do and your personal preferences. Here are some popular options:
- Drop bars: These are the most common type of handlebar for bikepacking. They provide multiple hand positions, which can help alleviate hand fatigue during long rides. Drop bars also offer excellent control over the bike, making it easier to navigate technical terrain.
- Risers: These are similar to drop bars but with a slight upward bend. They provide a more upright riding position, which can be more comfortable for some riders. Risers are a good option if you plan to do a lot of gravel or dirt road riding.
- Bars with a high rise: These are similar to risers but with a steeper upward bend. They provide an even more upright riding position, which can be helpful for riders who want to reduce strain on their neck and back.
- Flat bars: These are the most upright type of handlebar. They are a good option if you plan to do a lot of off-road riding on technical terrain. Flat bars provide excellent control over the bike and offer plenty of room to mount accessories like lights and phones.
When swapping the handlebar, it’s important to consider the following factors:
- Fit: The handlebar should be comfortable and allow you to maintain a relaxed grip. It should also provide a neutral hand position that minimizes strain on your wrists and arms.
- Reach: The reach of the handlebar refers to how far it extends from the stem. A longer reach can provide more leverage, which can be helpful for climbing or descending steep terrain. However, it can also lead to hand fatigue.
- Width: The width of the handlebar can affect your control over the bike. A wider handlebar can provide more leverage, which can be helpful for technical terrain. However, it can also make the bike more difficult to maneuver in tight spaces.
Overall, swapping the handlebar is an essential customization for bikepacking. It allows you to adjust the riding position to your personal preferences and the type of terrain you plan to ride.
Installing a new fork
When it comes to bikepacking, having a bike that is set up for optimal performance is crucial. One of the most important modifications you can make to your bike is installing a new fork. Here’s what you need to know:
First, you’ll need to decide what type of fork you want. There are several options available, including suspension forks, rigid forks, and fat forks. Each type has its own advantages and disadvantages, so it’s important to choose the right one for your needs.
Suspension forks are the most popular option for bikepacking, as they provide better shock absorption and control over rough terrain. However, they can be more expensive and require more maintenance than rigid forks.
Rigid forks are a good option for those on a budget or who don’t need the extra suspension. They are also easier to maintain and weigh less than suspension forks.
Fat forks are designed for use on very rough terrain, such as sand or snow. They are wider than traditional forks and provide better stability and traction.
Once you’ve decided on the type of fork you want, it’s time to install it. This is a job that requires some mechanical skills, so if you’re not comfortable with this type of work, it’s best to take your bike to a professional.
To install a new fork, you’ll need to remove the old fork and headset, and then install the new fork and headset. You’ll also need to adjust the fork’s preload and rebound to ensure proper performance.
It’s important to note that installing a new fork can affect your bike’s handling and performance, so it’s important to take the time to set it up properly. A professional bike mechanic can help you with this process and ensure that your bike is set up for optimal performance.
Safety Considerations for Bikepacking
Proper fit and safety gear
Bikepacking requires proper fit and safety gear to ensure a safe and comfortable ride. The following are essential safety gear for bikepacking:
- Helmet: A helmet is the most crucial safety gear for bikepacking. It protects the rider from head injuries in case of a fall or collision. A well-fitting helmet should be worn at all times while cycling.
- Gloves: Cycling gloves provide protection for the hands and help to improve grip on the handlebars. They also cushion the hands in case of a fall.
- Water bottle holder: A water bottle holder is essential for staying hydrated during long rides. It should be easily accessible and securely attached to the bike.
- Lights: Lights are essential for visibility during night rides or in areas with low light conditions. A front light and rear light should be used to increase visibility and ensure safety.
- Mirror: A mirror helps the rider to keep an eye on the road behind them and avoid obstacles. It should be securely attached to the bike and positioned for easy viewing.
- Pump: A pump is essential for inflating tires in case of a flat tire. It should be easily accessible and suitable for the type of tires used on the bike.
- First aid kit: A first aid kit should be carried in case of any cuts, scrapes, or injuries that may occur during the ride. It should include items such as bandages, gauze, and antiseptic wipes.
- Navigation tools: Navigation tools such as a map, compass, or GPS device can help the rider navigate unfamiliar terrain and avoid getting lost.
Proper fit is also crucial for safety and comfort during bikepacking. The bike should be adjusted to fit the rider’s body size and riding style. The seat height should be adjusted to ensure proper posture and reach on the handlebars. The handlebars should also be adjusted to ensure a comfortable and efficient riding position. Proper fit can help to reduce fatigue and prevent injuries during long rides.
Emergency preparedness
Bikepacking is an adventurous and exciting activity, but it also comes with risks. Being prepared for emergencies is crucial to ensure a safe and enjoyable trip. Here are some essential items to include in your emergency kit:
- First aid kit: This should include items such as bandages, gauze, tweezers, and pain relievers.
- Multi-tool: A multi-tool can come in handy for a variety of situations, such as fixing your bike or opening bottles.
- Spare tube and tools: It’s always a good idea to carry a spare tube and the necessary tools to fix a flat tire.
- Emergency shelter: A lightweight and compact emergency shelter, such as a bivy sack or tarp, can save your life in case of severe weather conditions.
- Fire starter: A fire starter, such as a lighter or waterproof matches, can be crucial in starting a fire for warmth or cooking.
- Navigation tools: A compass and map can help you navigate in case you get lost or injured.
- Communication devices: A satellite phone or personal locator beacon can be vital in case of an emergency, especially if you are in a remote area.
By including these items in your emergency kit, you can be better prepared for any situation that may arise during your bikepacking trip. It’s important to regularly check and update your emergency kit to ensure that all items are in good condition and up-to-date.
Navigating challenging terrain
Bikepacking can take you through some of the most remote and challenging terrain, and proper navigation is key to staying safe and finding your way. Here are some essential tools and skills to help you navigate challenging terrain while bikepacking:
- Maps and GPS: Accurate maps and a reliable GPS device are essential for navigating challenging terrain. Make sure you have a detailed map of the area you’ll be riding in, and consider investing in a GPS device or smartphone app that can help you track your location and navigate through unfamiliar terrain.
- Compass: A compass is a simple but essential tool for navigating challenging terrain. It can help you stay on course and avoid getting lost, especially in areas with poor cell phone reception.
- Bike Computer: A bike computer with a mapping function can be a useful tool for navigating challenging terrain. It can help you track your progress, find the best route, and avoid getting lost.
- Headlamp and spare batteries: Challenging terrain can often mean riding in the dark, so make sure you have a reliable headlamp and spare batteries on hand. A headlamp can help you see the trail ahead and avoid obstacles, while spare batteries can ensure you have a reliable source of light if you’re out on the trail for an extended period.
- First aid kit: Challenging terrain can also mean an increased risk of accidents and injuries, so make sure you have a well-stocked first aid kit on hand. This should include basic first aid supplies such as bandages, gauze, tweezers, and pain relievers, as well as any specific medications you may need.
- Emergency communication devices: Challenging terrain can also mean that you may be out of cell phone range, so make sure you have an emergency communication device on hand. This could include a satellite phone, a personal locator beacon, or a whistle that can signal for help.
- Spare parts and tools: Finally, make sure you have spare parts and tools on hand in case of mechanical issues. This could include things like tire patches, tubes, tire irons, and multi-tools. Being prepared for mechanical issues can help you stay on the trail and avoid having to hike-a-bike through challenging terrain.
Additional resources for bikepacking accessories and customization
Bikepacking requires not only the right gear but also the knowledge of where to find the best equipment. There are several resources available to help you find the right accessories for your bikepacking adventure.
- Bikepacking Websites: Websites like Bikepacking.com and Bikepacking.net offer a wealth of information on the latest bikepacking gear and accessories. These websites also provide reviews and ratings of different products, making it easier for you to make an informed decision.
- Social Media Groups: Social media groups like Bikepacking SIG and Bikepacking in the UK are great resources for connecting with other bikepackers and getting advice on the best gear for your trip.
- Bike Shops: Your local bike shop can also be a great resource for finding the right accessories for your bikepacking adventure. The staff at your local bike shop can help you find the right gear and answer any questions you may have.
- Bikepacking Festivals: Bikepacking festivals like the Tour Divide and the Silk Road Mountain Race are great places to meet other bikepackers and check out the latest gear and accessories.
It’s important to research and compare different products before making a purchase. This will help you find the best gear for your needs and budget. Don’t be afraid to ask other bikepackers for advice and recommendations. With the right gear and accessories, you’ll be ready to tackle any bikepacking adventure that comes your way.
FAQs
1. What is bikepacking?
Bikepacking is a type of cycling that involves carrying gear and equipment on a bicycle for multi-day trips, typically off-road or on unpaved surfaces. It combines the physical challenge of cycling with the freedom and self-sufficiency of camping.
2. What are the essential accessories for bikepacking?
The essential accessories for bikepacking include a frame bag, handlebar bag, seat bag, water bottle holders, rack and panniers, lights, mirror, bell, and a multi-tool.
3. How do I choose the right frame bag?
When choosing a frame bag, consider the size and shape of your bike, the type of terrain you‘ll be riding on, and the amount of gear you need to carry. Look for a bag with a durable and waterproof liner, adjustable straps, and easy-to-use buckles.
4. How do I choose the right handlebar bag?
When choosing a handlebar bag, consider the size and shape of your bike, the type of terrain you‘ll be riding on, and the amount of gear you need to carry. Look for a bag with a durable and waterproof liner, adjustable straps, and easy-to-use buckles. Also, consider the weight of the bag and its mounting system.
5. How do I choose the right seat bag?
When choosing a seat bag, consider the size and shape of your bike, the type of terrain you‘ll be riding on, and the amount of gear you need to carry. Look for a bag with a durable and waterproof liner, adjustable straps, and easy-to-use buckles. Also, consider the weight of the bag and its mounting system.
6. How do I choose the right water bottle holders?
When choosing water bottle holders, consider the size and shape of your bike, the type of terrain you‘ll be riding on, and the amount of gear you need to carry. Look for holders that are durable, easy to attach and remove, and compatible with a variety of water bottle sizes.
7. How do I choose the right rack and panniers?
When choosing a rack and panniers, consider the size and shape of your bike, the type of terrain you‘ll be riding on, and the amount of gear you need to carry. Look for a rack that is strong and stable, and panniers that are durable, waterproof, and easy to load and unload.
8. How do I choose the right lights?
When choosing lights, consider the type of terrain you’ll be riding on, the amount of time you’ll be riding, and the distance you’ll be riding. Look for lights that are bright, durable, and easy to attach and remove.
9. How do I choose the right mirror?
When choosing a mirror, consider the type of terrain you’ll be riding on, the amount of time you’ll be riding, and the distance you’ll be riding. Look for a mirror that is adjustable, durable, and easy to attach and remove.
10. How do I choose the right bell?
When choosing a bell, consider the type of terrain you’ll be riding on, the amount of time you’ll be riding, and the distance you’ll be riding. Look for a bell that is loud, durable, and easy to attach and remove.
11. How do I choose the right multi-tool?
When choosing a multi-tool, consider the type of terrain you’ll be riding on, the amount of time you’ll be riding, and the distance you’ll be riding. Look for a multi-tool that has the tools you need most, such as Allen keys, screwdrivers, and a