Cycling is a popular activity for people of all ages and abilities. Whether you’re a casual rider or a competitive cyclist, it’s important to know how to perform basic maintenance on your bike. Keeping your bike in good condition can help prevent breakdowns and ensure a safe and enjoyable ride. In this article, we’ll cover the essentials of bike maintenance, including tire pressure, chain lubrication, and brake inspection. With these simple tips, you’ll be able to keep your bike in top shape and enjoy the ride. So, let’s get started!
To perform basic maintenance on your bike, start by checking the tire pressure and inflating them if necessary. Then, check the brakes by gently applying pressure to the brake lever and ensuring that the brake pads are not worn. Lubricate the chain and cables with oil, and check the tightness of the bearings by pedaling and listening for any unusual noises. Clean the bike and inspect for any damage or wear and tear. Finally, keep a record of any maintenance done on the bike and regularly check the quick release levers to ensure they are securely tightened.
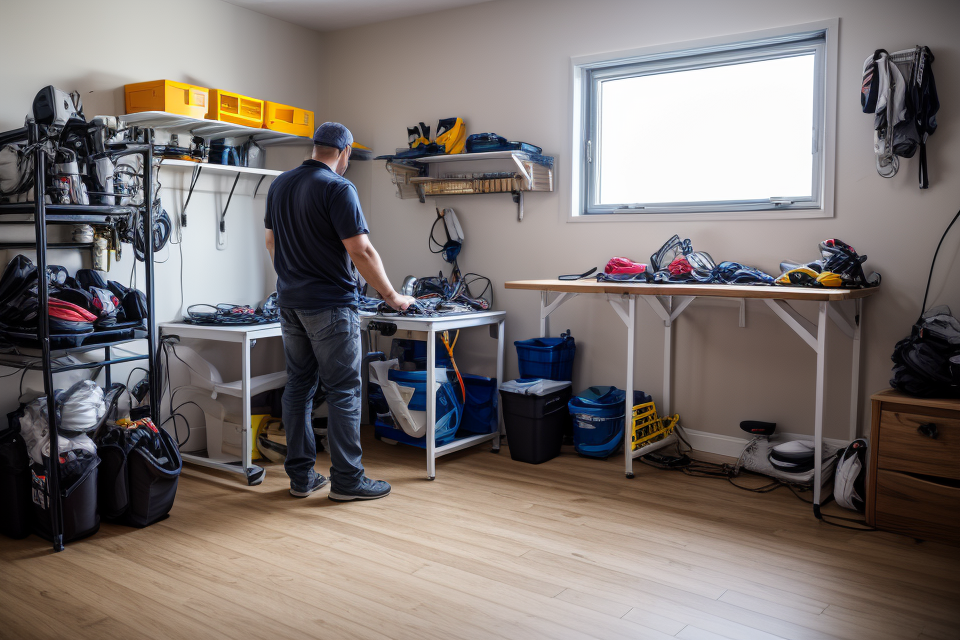
Preparing Your Bike for Maintenance
Checking Tire Pressure
Before starting any maintenance task on your bike, it is essential to ensure that your tires are properly inflated. Underinflated tires can cause poor handling, reduced traction, and increased wear on the tires and rims. Overinflated tires can lead to reduced shock absorption and an uncomfortable ride. Therefore, checking the tire pressure is a crucial part of bike maintenance.
Here are the steps to follow when checking the tire pressure:
- Locate the tire pressure valve: The tire pressure valve is usually located on the rim of the tire, near the valve stem. It may be covered by a small cap or rubber dust cover.
- Remove the cap: Carefully remove the cap to expose the valve stem. Make sure the valve is clean and free of dirt or debris.
- Check the pressure: Use a tire gauge to measure the pressure in each tire. Insert the gauge into the valve stem and read the pressure in pounds per square inch (PSI). The recommended pressure for most road bikes is between 6 and 8 bars, which translates to 90 to 120 PSI. However, it is essential to check the manufacturer’s recommendations for your specific bike model.
- Adjust the pressure: If the pressure is too low, use a pump or an air compressor to inflate the tire to the recommended pressure. Make sure to inflate the tires evenly, and avoid overinflating them. It is also a good idea to check the pressure before each ride and adjust as needed.
By following these simple steps, you can ensure that your bike’s tires are properly inflated, which will improve the performance and safety of your bike.
Lubricating the Chain
Proper lubrication of the chain is essential for the smooth operation of your bike. Here are the steps to follow:
- Use a bike-specific lubricant: Using a lubricant specifically designed for bikes is crucial as it has the right viscosity and ingredients to protect your bike’s chain.
- Apply it to the chain and allow it to penetrate for a few minutes: After applying the lubricant to the chain, allow it to penetrate for a few minutes before wiping off any excess lubricant. This will give the lubricant enough time to coat the chain and protect it from rust and corrosion.
- Wipe off any excess lubricant: Once the lubricant has penetrated the chain, use a clean cloth to wipe off any excess lubricant. This will prevent the lubricant from getting on your clothes or anywhere else it’s not supposed to be.
It’s important to note that the frequency of lubrication will depend on the conditions in which you ride your bike. If you ride in a dusty or dirty environment, you may need to lubricate your chain more often. Similarly, if you ride in a wet environment, you may need to use a water-resistant lubricant to protect your chain from rust.
Cleaning the Bike
Before you begin any maintenance on your bike, it’s important to thoroughly clean it first. This will allow you to properly inspect the bike and identify any issues that may need to be addressed. Here are the steps you can follow to clean your bike:
- Remove any loose debris or dirt from the bike:
This includes things like leaves, twigs, and other small objects that may be stuck to the bike. Use a brush or your hands to remove these items. - Use a soft cloth or sponge to wipe down the bike:
Avoid using harsh chemicals or abrasive cleaners, as these can damage the bike’s paint or finish. Instead, use a soft cloth or sponge and some warm, soapy water to wipe down the bike. Pay extra attention to the chain, drivetrain, and brakes, as these areas tend to get dirty quickly. - Dry the bike thoroughly:
After you’ve cleaned the bike, make sure to dry it thoroughly. This will help prevent rust and corrosion from forming on the bike’s components. You can use a clean towel or a hair dryer to speed up the drying process.
By following these steps, you’ll be able to thoroughly clean your bike and prepare it for maintenance. Remember to regularly clean your bike to keep it in good condition and ensure it continues to perform well.
Basic Maintenance Tasks
Changing the Bike Tires
Changing the bike tires is a crucial part of maintaining your bike. Over time, bike tires can wear out, get punctured, or become flat. In this section, we will guide you through the process of changing your bike tires.
Step 1: Gather the necessary tools
Before you start changing the tire, make sure you have all the necessary tools. You will need a tire iron, a bike pump, and a tire patch kit.
Step 2: Remove the old tire
Use a tire iron to loosen the tire bead from the rim. Start at the valve stem and work your way around the tire. Once the bead is loose, pull the tire straight off the rim.
Step 3: Inspect the rim and tire
Before installing the new tire, inspect the rim and tire for any damage. Make sure the rim is clean and free of any debris that could damage the new tire.
Step 4: Install the new tire
Place the new tire on the rim and ensure that it is properly seated. Use the tire iron to push the tire bead onto the rim. Start at the valve stem and work your way around the tire until the bead is fully seated.
Step 5: Inflate the tire
Once the tire is installed, inflate it to the recommended pressure. You can find the recommended pressure for your bike in the owner’s manual or on the tire itself. Use the bike pump to inflate the tire slowly and evenly.
Remember, changing the bike tires is a crucial part of maintaining your bike. By following these steps, you can ensure that your bike is always in good condition and ready to ride.
Adjusting the Brake Pads
Adjusting the brake pads is an essential part of maintaining your bike’s safety and performance. Over time, the brake pads can wear down, making it difficult to stop your bike effectively. Here’s how you can adjust the brake pads:
- Locate the brake pads: First, locate the brake pads on your bike. They are usually located near the wheels and are attached to the brake calipers.
- Use a screwdriver: To adjust the brake pads, you will need a screwdriver. Place the screwdriver in the gap between the brake pad and the rim of the wheel.
- Adjust the pad: Use the screwdriver to push the brake pad away from the rim. Ensure that the pad is parallel to the rim and not touching. You should hear a slight click when the pad is in the correct position.
- Test the brakes: Once you have adjusted the brake pads, test the brakes to ensure they are functioning properly. Apply pressure to the brake lever or pedal and make sure the bike stops smoothly and evenly.
Remember to check your brake pads regularly and adjust them as needed to ensure your bike is always in top condition.
Checking the Tire Thread
- Inspect the tire thread for signs of wear
- Replace the tire if the thread is worn down to 1/8 inch
When it comes to the safety and performance of your bike, checking the tire thread is an essential aspect of basic maintenance. Worn-out tire threads can significantly affect your riding experience, making it more difficult to control your bike and increasing the risk of accidents. Therefore, it is crucial to know how to inspect your tire threads and replace them when necessary.
To begin with, inspect the tire thread for signs of wear. A simple way to do this is to take a close look at the tire and examine the thread pattern. If you notice any visible signs of wear, such as fraying or missing threads, it’s time to replace the tire. In addition to visible signs, you can also measure the tire thread depth using a tire tread depth gauge or a coin. If the thread depth is less than 1/8 inch, it’s recommended to replace the tire.
Replacing the tire can be a daunting task, but it’s a crucial part of basic maintenance. The best way to replace the tire is to take it to a professional bike mechanic, who will have the necessary tools and expertise to do the job efficiently. However, if you’re confident in your mechanical skills, you can also replace the tire yourself by following these steps:
- Purchase a new tire that matches the specifications of your bike.
- Remove the wheel from the bike and deflate the tire.
- Remove the tire from the wheel using tire levers or a tire iron.
- Inspect the tire rim for any damage and clean it thoroughly.
- Mount the new tire onto the wheel, ensuring that it’s seated correctly.
- Inflate the tire to the recommended pressure for your bike.
- Reinstall the wheel onto the bike and test the brakes.
In conclusion, checking the tire thread is a critical aspect of basic maintenance for your bike. By inspecting the tire threads regularly and replacing them when necessary, you can ensure that your bike is safe to ride and performs optimally.
Advanced Maintenance Tasks
Changing the Bike Tubes
When it comes to basic maintenance for your bike, changing the bike tubes is a task that every cyclist should know how to do. Bike tubes are prone to wear and tear, and eventually, they will need to be replaced. Here’s how you can do it:
Use a patch kit to repair any small punctures
Before you start replacing the tube, check for any small punctures or holes on the tube. If you find any, use a patch kit to repair them. Patch kits usually come with a small piece of rubber that you can place over the hole and then seal it with glue. Make sure to clean the area around the hole before applying the patch to ensure that it sticks properly.
Remove the tire and replace the tube
To replace the tube, you’ll need to remove the tire from the bike. This can be done by deflating the tire and then removing the tire valve. Once the tire is off, you can remove the old tube from the tire.
To put on a new tube, start by inflating the tire slightly and then placing the new tube inside the tire. Make sure that the valve stem is pointing towards the top of the tire. Once the tube is in place, inflate it to the recommended pressure for your bike.
Inflate the tire and test the bike to ensure everything is working properly
After you’ve replaced the tube, it’s important to inflate the tire to the recommended pressure and test the bike to ensure everything is working properly. Make sure that the tire is properly seated on the rim and that there are no leaks or punctures.
By following these steps, you can ensure that your bike is always in good working order and ready to ride. Remember to perform regular maintenance tasks such as checking the tire pressure and lubricating the chain to keep your bike in top condition.
Changing the Bike Battery
If you’re an avid cyclist, you know that the battery on your bike is what powers the various electronic components such as the lights, horn, and motor (if your bike is electric). Over time, the battery’s charge may begin to decline, making it necessary to replace it. Here’s how to change the battery on your bike:
Removing the Battery
- Start by locating the battery on your bike. This is usually found in a compartment under the seat or in the frame.
- Consult your bike’s manual for specific instructions on how to remove the battery. This may involve removing screws or unplugging wires.
- Be careful when removing the battery as it can be heavy and may cause damage if dropped.
Cleaning the Battery Contacts
- Once the battery is removed, clean the battery contacts with a cloth or brush. This will remove any dirt or debris that may have accumulated over time.
- If the contacts are corroded, use a small amount of baking soda and water to create a paste. Apply the paste to the contacts and let it sit for a few minutes before rinsing off with water.
Reinstalling the Battery
- After cleaning the battery contacts, reinstall the battery in the bike.
- Make sure the battery is securely in place and that all wires and connections are secure.
- Turn on the bike and test the various electronic components to ensure everything is working properly.
By following these steps, you can easily change the battery on your bike and ensure that it’s always running smoothly.
Inspecting the Bike Frame
When it comes to advanced maintenance tasks, inspecting the bike frame is a crucial step that should not be overlooked. Here are some important things to keep in mind when inspecting your bike frame:
- Check for any signs of rust or corrosion: Over time, exposure to the elements can cause rust and corrosion to form on the frame. This can weaken the frame and compromise its structural integrity. It’s important to inspect the frame for any signs of rust or corrosion, and to take action if any is found.
- Inspect the frame for any cracks or damage: It’s also important to inspect the frame for any cracks or damage. These can also compromise the structural integrity of the frame and make it unsafe to ride. If any cracks or damage are found, it’s important to contact a professional to have the frame repaired or replaced.
- Contact a professional if any issues are found: If you find any signs of rust, corrosion, cracks, or damage on your bike frame, it’s important to contact a professional. They will be able to assess the damage and recommend the best course of action to repair or replace the frame. Failing to address these issues can result in a dangerous situation while riding.
FAQs
1. What are the basic maintenance tasks that I should perform on my bike?
Answer: Regular maintenance tasks for a bike include checking and maintaining tire pressure, cleaning the bike, checking and lubricating the chain, checking the brakes, and checking the fluid levels. It is important to regularly check and maintain these parts to ensure the bike is in good working condition and to prevent any unexpected breakdowns.
2. How often should I perform these maintenance tasks?
Answer: It is recommended to perform these maintenance tasks at least once a month, or more frequently if you ride your bike frequently. Checking and maintaining your bike regularly will help you catch any potential issues before they become serious problems, and will help ensure that your bike is always in good working condition.
3. How can I tell if my bike needs maintenance?
Answer: There are several signs that your bike may need maintenance. Some of these signs include: difficulty shifting gears, unusual noises, a rough ride, or if the bike is not working as efficiently as it should be. If you notice any of these issues, it is a good idea to perform some basic maintenance on your bike to identify and fix any potential problems.
4. What tools do I need to perform basic maintenance on my bike?
Answer: You will need a few basic tools to perform maintenance on your bike, including a bike pump to check and maintain tire pressure, a cleaning solution and cloth to clean the bike, a chain lubricant, and a multitool to adjust and maintain the bike’s components. You may also need to purchase replacement parts if any of the components on your bike need to be repaired or replaced.
5. Can I perform the maintenance tasks myself or should I take it to a professional?
Answer: It is possible to perform the basic maintenance tasks on your bike yourself, but it is important to have some basic knowledge of bicycle mechanics and maintenance. If you are not comfortable performing the maintenance tasks yourself, it is recommended to take your bike to a professional bicycle mechanic for assistance. They will be able to properly diagnose and fix any issues with your bike, and will have the necessary tools and equipment to perform the maintenance tasks efficiently.