Are you a cycling enthusiast who loves to explore the great outdoors? If so, you’re probably already familiar with the joys of bikepacking. This adventurous activity allows you to take your bike off-road and venture into the wilderness, exploring new trails and scenic vistas along the way. But where do you pack your gear for such an excursion? In this article, we’ll explore the best places to store your gear for bikepacking, so you can focus on the ride and not worry about your belongings. From saddlebags to handlebar bags, we’ll cover all the essential storage options for your next bikepacking adventure. So, gear up and let’s hit the trails!
Bikepacking is an excellent way to explore the great outdoors, but finding the right place to store your gear can be a challenge. There are a few key considerations to keep in mind when choosing where to stash your equipment. First, you’ll want to make sure that your gear is easily accessible while you’re on the go. This means finding a location that’s close to your bike and won’t require you to take your pack off to get to your essentials.
Second, you’ll want to consider the security of your gear. Ideally, you’ll want to find a place where your equipment is protected from the elements and potential thieves. This might mean finding a secure lockup or using a waterproof bag to protect your gear from the elements.
Finally, you’ll want to think about the overall convenience of the storage location. Is it easy to get to and from your bike? Is it located near any necessary amenities, like restrooms or food? These factors can all play a role in making sure that your bikepacking trip is as enjoyable and stress-free as possible.
In terms of specific places to store your gear, there are a few options to consider. A good bike lock is essential for securing your bike and any equipment attached to it. You might also consider investing in a waterproof bag to protect your gear from the elements. Additionally, consider the convenience of storage options like bike racks or lockers. These can provide a secure and easily accessible place to store your gear while you’re on the go.
H2: Planning Your Bikepacking Trip
H3: Identifying Your Gear Needs
- Assessing the length and intensity of your trip
- One of the first steps in identifying your gear needs is to assess the length and intensity of your bikepacking trip. This will help you determine how much gear you need to bring and how much weight you can comfortably carry on your bike.
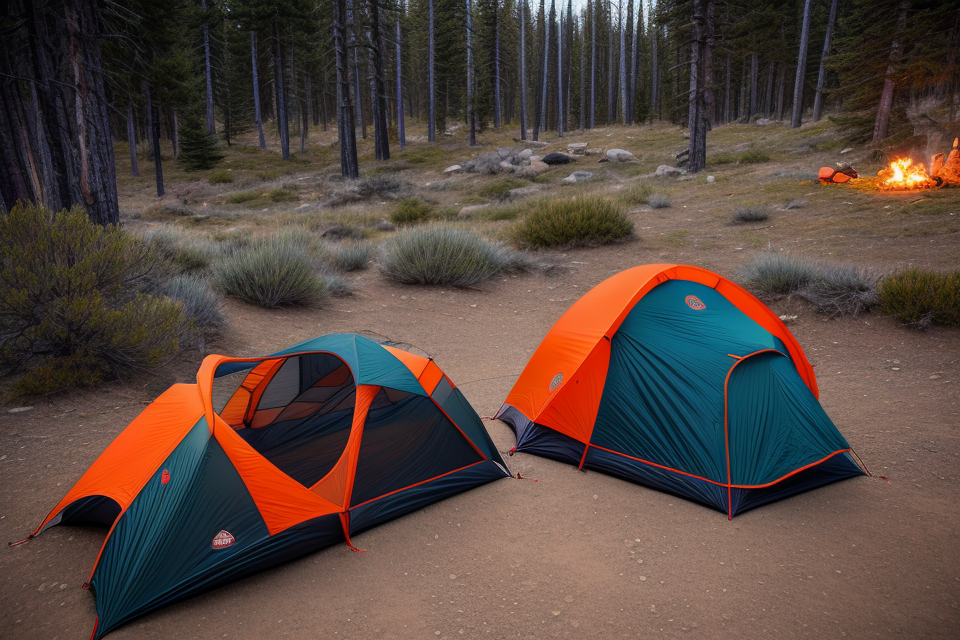
- For shorter trips, you may only need to bring essentials such as food, water, and basic repair tools. However, for longer trips, you may need to bring additional gear such as a tent, sleeping bag, and warm clothing.
- The intensity of your trip can also impact your gear needs. If you plan on tackling difficult terrain or challenging weather conditions, you may need to bring more specialized gear such as crampons or an ice axe.
- Determining the climate and terrain
- Another important factor to consider when identifying your gear needs is the climate and terrain of the area you will be biking in.
- For example, if you are planning a trip in a hot and humid climate, you may need to bring more sunscreen, insect repellent, and hydration supplies.
- If you will be biking in a cold climate, you may need to bring warm clothing, gloves, and a hat.
- The terrain can also impact your gear needs. If you will be biking in an area with steep hills or mountains, you may need to bring additional repair tools and a first aid kit.
- Prioritizing essential items
- When identifying your gear needs, it is important to prioritize essential items that you cannot do without.
- These essential items may include a first aid kit, navigation tools, and a communication device such as a phone or two-way radio.
- It is also important to consider the weight and size of your gear when prioritizing essential items. While some items may be essential, they may also be heavy or take up a lot of space in your pack.
- In these cases, it may be necessary to find lighter alternatives or leave some items behind.
H3: Organizing Your Gear
Deciding on a frame bag or backpack
When it comes to organizing your gear for bikepacking, one of the first decisions you’ll need to make is whether to use a frame bag or a backpack. Frame bags are designed to attach to the frame of your bike, while backpacks are designed to be worn on your back.
- Advantages of frame bags:
- They offer easy access to your gear while you’re riding, as they’re located close to your body.
- They provide more stability for heavier loads, as they’re attached directly to the frame of your bike.
- They allow you to keep your gear organized and secure, as they’re designed specifically for bikepacking.
- Disadvantages of frame bags:
- They can be less comfortable than backpacks, especially if you’re wearing a heavy load for an extended period of time.
- They can limit your mobility, as they’re attached to the frame of your bike.
Selecting panniers or handlebar bags
Another decision you’ll need to make when organizing your gear for bikepacking is whether to use panniers or handlebar bags. Panniers are designed to attach to the sides of your bike, while handlebar bags are designed to attach to the handlebars.
- Advantages of panniers:
- They offer easy access to your gear while you’re riding, as they’re located at the sides of your bike.
- They provide more stability for heavier loads, as they’re designed to fit securely onto the sides of your bike.
- Disadvantages of panniers:
- They can be less comfortable than handlebar bags, especially if you’re wearing a heavy load for an extended period of time.
- They can limit your mobility, as they’re attached to the sides of your bike.
Using saddlebags or seat packs
Saddlebags and seat packs are two other options for storing your gear while bikepacking. Saddlebags are designed to attach to the rear of your bike, while seat packs are designed to attach to the seatpost.
- Advantages of saddlebags:
- They offer easy access to your gear while you’re riding, as they’re located at the rear of your bike.
- They provide more stability for heavier loads, as they’re designed to fit securely onto the rear of your bike.
- Disadvantages of saddlebags:
- They can limit your mobility, as they’re attached to the rear of your bike.
Overall, the best way to organize your gear for bikepacking will depend on your personal preferences and the specific needs of your trip. It’s important to carefully consider the advantages and disadvantages of each option before making a decision.
H2: Choosing the Right Storage Spots
H3: Frame Bags
Frame bags are a popular choice for storing small and lightweight items while bikepacking. They are ideal for organizing essentials such as tools, spare tubes, and food. When choosing frame bags, it is important to consider the size and shape of your frame.
Some factors to consider when selecting frame bags include:
- Capacity: Make sure the frame bags you choose have enough capacity to hold all the gear you need for your trip. Consider the weight and size of the items you want to store, as well as the total volume of the bags.
- Location: Think about where you want to store your gear on your bike. For example, you may want to keep your tools and spare tubes easily accessible on the downtube, while your food and extra clothing can be stored on the top tube.
- Fit: Frame bags should fit your bike frame perfectly to prevent movement and ensure they don’t rub against your legs or get in the way while you ride. Look for bags that are designed to fit specific types of frames, or measure your frame and choose bags that are the right size.
- Material: Frame bags are typically made from a variety of materials, including nylon, cordura, and tarpaulin. Consider the durability, water resistance, and weight of the material when making your choice.
In addition to frame bags, there are other storage options to consider for bikepacking, such as handlebar bags, seat bags, and rear bags. The best place to store your gear will depend on your personal preferences and the specific needs of your trip.
H3: Backpacks
Backpacks are an essential part of bikepacking gear as they provide a convenient and secure way to carry essential items. They are designed to carry heavier loads and distribute the weight evenly across the body. When choosing a backpack for bikepacking, consider the following factors:
- Carrying heavier loads: Bikepacking backpacks are designed to carry heavier loads than traditional backpacks. They typically have a larger capacity and more robust construction to withstand the demands of off-road cycling. Look for a backpack with a capacity of at least 20 liters, and choose one with a frame that supports the weight of your gear.
- Storing clothes, shelter, and extra layers: Backpacks for bikepacking typically have a main compartment and multiple smaller pockets for storing clothes, shelter, and extra layers. The main compartment should be large enough to accommodate your sleeping bag, tent, and other bulky items. The smaller pockets should be designed to keep your essentials close at hand, such as your bike tools, food, and first aid kit.
- Balancing weight distribution: The weight of your gear should be distributed evenly across your body to prevent discomfort and injury. Choose a backpack with a well-designed suspension system that provides support and stability. Look for a backpack with a ventilated back panel and shoulder straps that can be adjusted for a custom fit. This will help to prevent chafing and sweating, even when you’re riding for long distances.
When storing your gear in your backpack, it’s essential to pack it efficiently to make the most of the available space. Roll your clothes and pack your gear tightly to save space. Use compression straps to secure your gear and prevent it from shifting during your ride. By packing your gear strategically, you can ensure that you have everything you need for a successful bikepacking trip without weighing you down.
H3: Panniers and Handlebar Bags
When it comes to storing your gear for bikepacking, panniers and handlebar bags are two popular options. Here’s what you need to know about each:
- Distributing weight between the front and rear: Panniers and handlebar bags can help you distribute the weight of your gear between the front and rear of your bike. This can make your bike more balanced and easier to handle, especially if you’re carrying a heavy load.
- Organizing bulky items like camping gear: Panniers and handlebar bags are ideal for storing bulky items like camping gear, clothes, and food. They can be easily accessed while you’re riding, so you don’t have to stop and take them off your bike every time you need something.
- Ensuring secure attachment to your bike: It’s important to make sure that your gear is securely attached to your bike to avoid accidents and to keep your gear from falling off during transit. Panniers and handlebar bags come with attachment systems that are designed to keep your gear securely attached to your bike, so you can focus on the ride without worrying about your gear.
Overall, panniers and handlebar bags are great options for storing your gear for bikepacking. They allow you to distribute weight between the front and rear of your bike, organize bulky items, and ensure secure attachment to your bike.
H3: Saddlebags and Seat Packs
- Storing items you need quick access to
- Locating essentials like hydration systems, mobile phones, and light sources in easily accessible areas for frequent use during bikepacking trips.
- Carrying snacks, first aid kits, and bike tools
- Ensuring convenient access to provisions, medical supplies, and repair equipment to maintain readiness during extended bikepacking expeditions.
- Adjusting to different saddle shapes and sizes
- Considering personal preferences and anatomical factors when selecting saddlebags or seat packs that offer a comfortable fit and efficient storage options.
H2: Customizing Your Storage Solutions
H3: Modifying Your Frame Bag or Backpack
Modifying your frame bag or backpack is an effective way to customize your storage solutions for bikepacking. With a little creativity and some basic sewing skills, you can add pockets and compartments, secure straps and buckles, and experiment with different arrangements to optimize your gear storage.
Adding Pockets and Compartments
Adding pockets and compartments to your frame bag or backpack can help you organize your gear and keep everything in its place. You can add small zippered pockets for snacks and essentials, larger pockets for bulkier items like spare clothes, or even dedicated compartments for specific items like bike tools or first aid kits. To add pockets and compartments, you can either purchase additional storage pouches or make your own using materials like Cordura nylon or other durable fabrics.
Securing Straps and Buckles
Securing straps and buckles can help you keep your gear in place and prevent it from shifting during your ride. You can add straps to attach your frame bag or backpack to your bike, or use buckles to secure the bag or backpack to your body. You can also use straps and buckles to attach items like water bottles or spare tires to your bike, so you can access them easily during your ride. To add straps and buckles, you can use webbing or other sturdy materials, and attach them using clips or other hardware.
Experimenting with Different Arrangements
Experimenting with different arrangements can help you optimize your gear storage and make the most of your frame bag or backpack. You can try different configurations of pockets and compartments, or arrange your gear in a way that maximizes your efficiency and minimizes your discomfort. You can also experiment with different attachment methods, such as using additional straps or clips to secure your gear in place. By experimenting with different arrangements, you can find the setup that works best for you and your specific needs.
H3: Maximizing Your Pannier or Handlebar Bag Space
- Organizing Your Gear
- Identifying Essential Items
- Prioritizing and Packing
- Pannier Tips
- Rolling Clothes to Save Space
- Stuffing Bulky Items into Corners
- Using Dry Bags for Wet Gear
- Attaching and Securing Panniers
- Adjusting Pannier Sizes
- Securing Panniers to the Bike
- Using Pannier Straps and Pockets
Organizing Your Gear
Proper organization is crucial when it comes to maximizing the space in your panniers or handlebar bags. To get started, begin by identifying the essential items you will need for your bikepacking trip. Once you have your list, prioritize and pack your gear accordingly. This will help you make the most of the available space while ensuring that you have all the essentials at your fingertips.
Pannier Tips
To make the most of your panniers, consider the following tips:
- Rolling Clothes to Save Space: When packing your clothes, consider rolling them up instead of folding them. This will help reduce wrinkles and save space in your panniers. Be sure to use clothes that can be easily rolled, such as t-shirts, socks, and lightweight pants.
- Stuffing Bulky Items into Corners: Larger items like sleeping bags or pads can take up a lot of space in your panniers. To make the most of the available room, stuff these items into the corners of your panniers. Be sure to wrap them in a waterproof bag or cover them with a dry towel to keep them protected from the elements.
- Using Dry Bags for Wet Gear: If you’re carrying wet gear, such as swimsuits or towels, consider using a dry bag to store them. Dry bags are designed to keep your gear dry and can be easily attached to the outside of your panniers or handlebar bags.
Attaching and Securing Panniers
Once you’ve packed your panniers, it’s important to ensure they are securely attached to your bike. Depending on the type of panniers you’re using, you may need to adjust the sizes to fit your bike frame. Make sure the panniers are securely attached to prevent them from coming loose during your ride. Additionally, consider using pannier straps and pockets to keep your gear organized and secure.
H3: Organizing Your Saddlebag or Seat Pack
Organizing your saddlebag or seat pack is an essential part of bikepacking. Proper organization will help you access your gear quickly and easily, keep your bike stable, and prevent any damage to your equipment. Here are some tips for organizing your saddlebag or seat pack:
- Pack essentials like lights and multi-tools: Make sure you have all the essentials you need for your bikepacking trip. This includes lights, multi-tools, and other small items that you may need to repair your bike or fix any issues that arise during your ride.
- Prioritize items you’ll need during stops: Consider the type of terrain and weather conditions you’ll be encountering during your ride, and prioritize the items you’ll need during stops. For example, if you’re riding in hot weather, you’ll want to have plenty of water and sunscreen accessible.
- Adjust for varying terrain and weather conditions: Depending on the type of terrain and weather conditions you’ll be encountering during your ride, you may need to adjust your packing strategy. For example, if you’re riding in wet conditions, you’ll want to make sure your gear is protected from moisture.
By following these tips, you can ensure that your saddlebag or seat pack is organized and ready for any situation that arises during your bikepacking trip.
H2: Maintaining Your Gear on the Go
H3: Checking Your Gear Regularly
- Inspecting your frame bag, backpack, and panniers
- Adjusting straps and buckles as needed
- Ensuring all zippers and pockets are functioning properly
Inspecting Your Frame Bag, Backpack, and Panniers
- Look for signs of wear and tear
- Check for any loose or damaged stitching
- Ensure all buckles and straps are in good condition
- Verify that your gear is properly secured to your bike
Adjusting Straps and Buckles as Needed
- Check your gear for proper fit and adjust as needed
- Ensure that all straps and buckles are securely fastened
- Avoid overloading your gear or overpacking
Ensuring All Zippers and Pockets Are Functioning Properly
- Check all zippers for smooth operation
- Make sure that all pockets are securely fastened
- Ensure that your gear is easily accessible while on the go
By regularly checking your gear, you can avoid any unexpected mishaps on the trail and ensure that your bikepacking adventure goes smoothly. It’s always better to catch any issues early on before they become bigger problems.
H3: Cleaning and Maintaining Your Gear
Proper cleaning and maintenance of your gear is crucial to ensure its longevity and performance during your bikepacking trips. Here are some tips on how to clean and maintain your gear:
- Wiping down your gear with a damp cloth: After each ride, wipe down your gear with a damp cloth to remove any dirt, mud, or debris that may have accumulated. This will help prevent damage to your gear and keep it in good condition.
- Drying your frame bag or backpack after rainstorms: If you get caught in a rainstorm, it’s important to dry your frame bag or backpack as soon as possible to prevent mold and mildew from forming. You can use a towel or let it air dry, but make sure it’s completely dry before packing it away.
- Airing out your panniers or saddlebags when possible: If you have the chance to air out your panniers or saddlebags, it’s a good idea to do so. This will help prevent the buildup of moisture and odors, which can lead to the growth of bacteria and other microorganisms. Simply open up the bags and let them air out for a few hours or overnight.
H3: Rotating Your Gear
- Shifting items from panniers to frame bags
- Adjusting the contents of your backpack or seat pack
- Reorganizing your gear based on the day’s demands
When bikepacking, it’s important to keep your gear organized and accessible at all times. One effective strategy for maintaining your gear on the go is to rotate your equipment regularly. This involves shifting items from panniers to frame bags, adjusting the contents of your backpack or seat pack, and reorganizing your gear based on the day’s demands.
By rotating your gear, you can ensure that your equipment is always accessible and that you’re making the most of the available space on your bike. This can help you stay organized and efficient, even as you face changing conditions and demands on the trail.
Shifting items from panniers to frame bags, for example, can help you reduce the overall weight of your bike and make it easier to maneuver in tight spaces. Adjusting the contents of your backpack or seat pack can help you optimize your comfort and efficiency, ensuring that you have the right gear at the right time. And reorganizing your gear based on the day’s demands can help you stay flexible and adaptable, even as your needs change over the course of your trip.
Overall, rotating your gear is a key part of maintaining your equipment on the go, and can help you stay organized, efficient, and comfortable as you bikepack your way through a variety of challenging terrain.
FAQs
1. What are the best places to store my gear for bikepacking?
There are a few different options for storing your gear while bikepacking. One option is to use a traditional backpack, which can be worn on your back and provides easy access to your gear while you’re riding. Another option is to use a handlebar bag, which attaches to your bike’s handlebars and provides easy access to your gear while you’re riding. Some riders also choose to use a rear rack bag, which attaches to the rear of their bike and provides additional storage space.
2. How do I choose the right storage solution for my bikepacking trip?
When choosing a storage solution for your bikepacking trip, it’s important to consider the type of terrain you’ll be riding on and the length of your trip. If you’ll be riding on rough terrain or carrying heavy gear, a backpack may be the best option. If you’re looking for easy access to your gear while you’re riding, a handlebar bag or rear rack bag may be a better choice. It’s also important to consider the size and weight of your gear, as well as the overall weight of your bike, when choosing a storage solution.
3. Can I use a traditional backpack for bikepacking?
Yes, you can use a traditional backpack for bikepacking. Backpacks are a popular choice for bikepacking because they provide easy access to your gear while you’re riding and can be worn on your back when you’re not on your bike. However, it’s important to choose a backpack that is designed for bikepacking, as traditional backpacks may not be designed to fit securely on your bike or provide the necessary storage space for a bikepacking trip.
4. Are there any safety concerns with using a storage solution for bikepacking?
When using a storage solution for bikepacking, it’s important to ensure that your gear is securely attached to your bike and won’t interfere with your ability to ride. You should also be aware of the weight of your gear and how it may affect the handling of your bike. Additionally, it’s important to make sure that your gear is protected from the elements, as exposure to rain, snow, or sunlight can damage your gear and potentially cause safety issues.